What makes a 3D puff file different
In a normal embroidery file, satin columns sit on the fabric. In a puff file, the satin has to sit on top of a 2 to 3 mm layer of foam, wrap down over its edges and pin it to the fabric, and at the same time perforate the foam along the outline so the leftover can be torn away. That changes almost every setting: the stitch type, the density, the underlay, how the ends are finished and the order everything sews in.
This is why you can't take a flat logo file, run it over foam and expect a good result. The stitches are too open, the column ends stay open and the fills flatten the foam. A puff file is digitized as its own job. If you want the short version of what this means for an order, the 3D puff digitizing service page covers it. This guide is the detailed how-to.
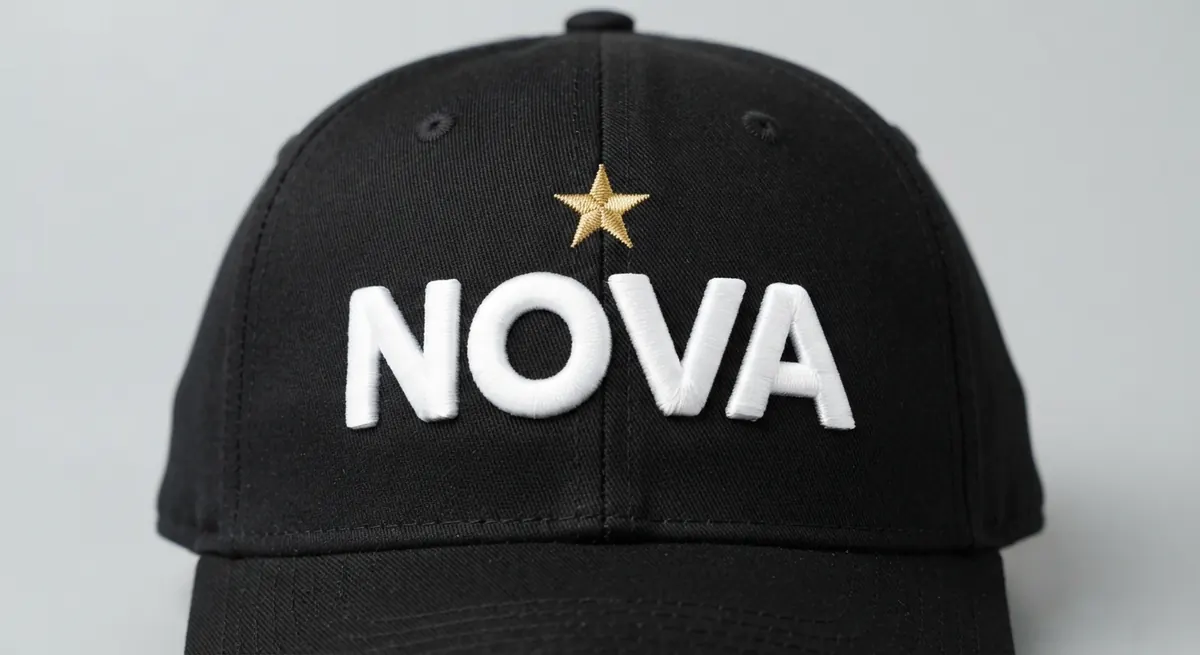 AI concept mockup
AI-generated concept mockup, not a client order. The brand is invented.
Before you start: check the artwork
Most puff problems start before the first stitch, with artwork that was never going to puff well. Check these points first and decide what to change.
- Letter height: puff lettering needs to be about a quarter inch (6 mm) tall or more. Smaller text can't hold foam and is sewn flat.
- Stroke width: the parts you want raised should be roughly 3 to 12 mm wide. Thinner strokes cut through the foam; much wider ones need fills, and fills crush it.
- Small openings: tight counters in letters like e, a and R can close up once the foam swells. Open them slightly in the artwork.
- Sharp points: very sharp corners and serifs are hard to seal. Blunt or round them a little.
- Overlaps: nothing should sew on top of a puff part after the foam is removed. Plan details beside the puff, not over it.
If the logo fails these checks, the usual answer is a mixed design: a bold wordmark in puff, with small text, outlines and icons sewn flat around it.
Step-by-step: digitizing a 3D puff design
These are the steps I follow for every puff file, whether it's a cap front, a hoodie chest or a varsity jacket back. The exact values depend on the software, the foam and the garment, so treat the numbers as starting points and confirm them with a test sew-out.
Step 1. Decide what puffs and what stays flat
Mark every element as puff or flat. Bold letters and simple shapes go to puff. Fine text, thin borders, small icons and any shading stay flat. On caps, a puff wordmark with a small flat detail (a star, a year, a tagline) is the classic layout.
Step 2. Plan the sequence and the foam stop
All flat elements sew first, while the fabric is still clear. Then the file needs a stop before the puff layer, usually a separate color step set to stop the machine, so the operator can lay the foam over the area. The puff elements sew last, all in one go, so the foam is placed once and not several times. On caps, the puff letters also follow the usual cap order: center-out and bottom-up, as explained in the flat to cap conversion guide.
Step 3. Build puff areas from satin columns only
Satin stitches go from edge to edge, so each stitch drops down over the foam on both sides and pins it. Fill stitches would chop the foam into small pieces and press it flat. Keep each puff column inside the working range of about 3 to 12 mm. Where a letter is wider, split it into narrower columns along natural lines of the letter rather than switching to a fill.
Step 4. Keep the underlay light
On a flat file, underlay builds a stable base. Under foam, heavy underlay does the opposite: it pushes the foam down and the letter loses height. Use no underlay or a single center run under puff columns. If the fabric needs stabilizing, give the flat elements their normal underlay and let the backing and the cap's buckram do the rest.
Step 5. Raise the satin density
The thread has to cover a curved, raised surface, so the stitches spread further apart over the top of the foam than they would on flat fabric. Puff satins are digitized tighter than flat satins so the foam is fully covered with no gaps along the sides. Too tight and the needle can cut the foam apart before it is sealed, so this is the setting most worth testing.
Step 6. Cap the ends and corners (closing the ends)
This is the step that separates a clean puff file from a messy one. Where a satin column simply stops, its last stitches run parallel to the end, and the foam pushes out through the open end. Each column end gets an end cap: a short run of stitches across the end, so the needle perforates and seals the foam there too. Corners are capped the same way and slightly rounded. Many embroidery programs have a puff or foam setting that adds caps automatically, but I still check every end by hand, because automatic caps often miss tight corners and the joins between letters.
Step 7. Plan travel, tie-ins and trims
Once the foam is down, every stitch matters. Start and end each puff element inside the shape, where the tie-in and tie-off are hidden under the satin. Avoid long jumps across the foam: a jump stitch lying on top of the foam gets trapped or leaves a thread to trim. Travel between letters along paths that the next satin will cover, and keep trims to the places where the letters are truly separate.
Step 8. Add pull compensation and check widths
Satin over foam pulls in a little more than on flat fabric, so puff columns usually need slightly more pull compensation to keep their designed width. After adding it, check the narrowest parts of each letter again: if pull compensation was added to a column that was already on the edge of the range, it may now need to be widened or moved to flat.
Step 9. Write the color sheet and test sew
The color sheet tells the operator where the machine will stop and what to do: which step is the foam, which foam thickness and color the file was built for, and the order of everything. Then the design is sewn on the same cap or garment it will be produced on. If foam shows at an end, a letter looks flat or an edge is fuzzy, the file is adjusted and tested again before production.
Flat satin vs 3D puff satin: settings at a glance
The table sums up how a puff column is set up differently from a normal satin. Your software, foam and fabric decide the exact values.
| Setting | Flat satin | 3D puff satin |
|---|---|---|
| Stitch type | Satin, fill or run | Satin only in the raised areas |
| Column width | Wide range; fills for large areas | About 3 to 12 mm; wider areas split into columns |
| Density | Normal for the fabric | Tighter, so the thread fully covers the foam |
| Underlay | Edge run, zigzag or center run | None or a center run, so the foam keeps its height |
| Column ends | Left open | Capped with stitches across the end |
| Corners | Sharp or mitered | Capped and slightly rounded |
| Pull compensation | Normal | Slightly more |
| Sequence | Any logical order | Flat parts first, stop, then all puff parts |
| Tie-ins and travel | Wherever convenient | Inside the shape, no jumps across foam |
Choosing the foam thickness
Embroidery foam is sold in different thicknesses and colors. 3 mm is the usual choice for cap fronts and most logos, and it's what I build files for unless a client says otherwise. Thinner foam gives a softer, lower lift that suits smaller lettering. Thicker foam gives dramatic height, but the satin has to travel further down the sides, so the file needs tighter density, stronger end caps and wider letters. Always tell your digitizer which foam you use, and pick a foam color that matches the thread, so any tiny gap at an edge disappears.
3D puff on caps vs garments
Structured caps are the best surface for puff. The stiff front panel supports the foam, and a raised wordmark of about 2 by 4 inches fills the front nicely. The file still needs everything a normal cap digitizing job needs: center-out sequencing, a size that fits the panel and care around the center seam.
Hoodies, sweatshirts and varsity jackets also take puff well, on the chest or as a large back design, because the heavier fabric holds the foam. For big back pieces the puff usually sits in the lettering while the rest is flat or applique; see jacket back digitizing. Beanies, thin T-shirts and stretchy knits are the hardest. The fabric moves under the foam, so a small puff element or plain flat embroidery is usually the better choice.
Why auto-digitized puff files often fail
Auto-digitizing and one-click puff settings can turn a logo into stitches, but they can't decide which parts of your logo should be raised, where the stop belongs, or how a tight corner should be closed. The typical results are fill stitches inside puff areas, uncapped ends, jumps across the foam and small text sitting on foam it can't hold. That's the same pattern explained in the guide to converting a logo to an embroidery file: software is fine for simple flat designs, while puff is a hand-digitizing job.
Frequently asked questions
How do you digitize for 3D puff embroidery?
Split the design into flat and puff parts, sew the flat parts first, add a machine stop for the foam, and build the puff parts from satin columns only, about 3 to 12 mm wide. Use tighter density, little or no underlay, slightly more pull compensation, and cap every column end and corner so the foam is cut and sealed. Then test sew on the real garment.
What density should a 3D puff satin have?
Tighter than a normal satin, so the thread covers the foam with no gaps along the sides. The exact value depends on your software, foam thickness and fabric, so start a little tighter than your usual satin and adjust after a test sew-out.
Should 3D puff have underlay?
Very little. Heavy underlay presses the foam down and the letters lose height. Puff columns usually get no underlay or a single center run, while the flat parts of the design keep their normal underlay.
Why does foam show at the ends of my puff letters?
The column ends are open. When a satin column simply stops, nothing perforates and seals the foam at the end, so it pushes out. The fix is in the file: add end caps, stitches running across each end and corner, and slightly round sharp corners.
What is the smallest text that can be done in 3D puff?
As a rule, puff letters should be about a quarter inch (6 mm) tall or more, with strokes at least about 3 mm wide. Smaller text is sewn flat next to the puff elements.
Can I convert my existing flat embroidery file to 3D puff?
Usually the puff parts have to be redigitized. A flat file has fills, open ends and normal density, and a stitch-only format like DST can't be edited cleanly into a puff file. The flat details can often be kept, and the puff letters are rebuilt from the artwork.
Send your logo. Get a hand-built 3D puff file with a fixed quote upfront.
Tell me the cap or garment, the size, your foam thickness and your machine. You get the puff file, the editable EMB, a stitch count and a color sheet that marks the foam stop, with free edits until it sews right.