3D Puff Digitizing
Raised 3D puff embroidery files for caps, hoodies and jackets, digitized by hand with dense capped satin columns and a foam stop, so the foam is cut clean and never shows.
Raised puff lettering that cuts clean and stands tall.
3D puff only looks premium when the file is built for foam. I digitize every puff design by hand with dense, capped satin columns, a foam stop in the right place and flat details where puff would fail, so your caps and jackets come off the machine with sharp, raised edges and no foam showing.
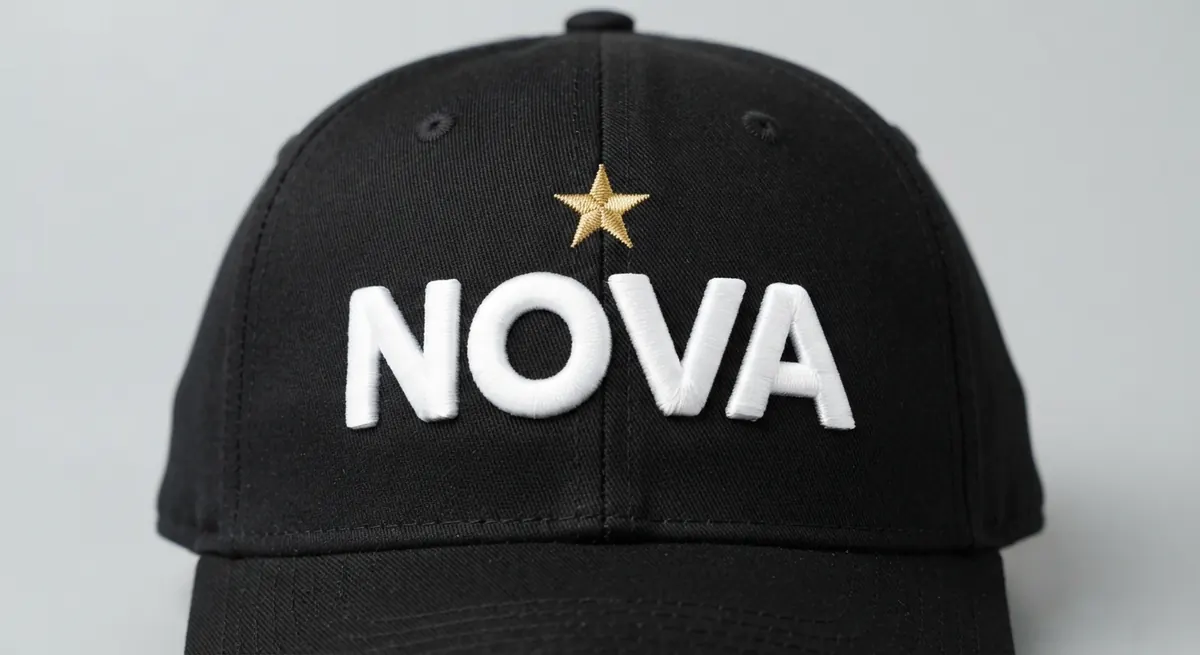 AI concept mockup
AI-generated concept mockup, not a client order. The brand is invented. It shows the look of puff lettering with a flat star.
What 3D puff embroidery is
3D puff (also called puff embroidery or raised embroidery) gives a logo real height. The machine first sews any flat parts of the design, then stops. The operator lays a sheet of embroidery foam over the area, and the machine sews dense satin columns straight over it. The needle perforates the foam along every edge, the leftover foam is torn away, and what remains is a smooth, rounded letter that stands off the fabric.
The catch is that a normal embroidery file can't do this. If you take a flat logo and simply sew it over foam, the stitches are too open, the ends of each letter stay open, and the foam pokes out of the sides like crumbs. Puff has to be planned from the first stitch, which is why it's digitized as its own job rather than a setting you switch on.
How I digitize a design for puff
- Satin only in puff areas: fill stitches flatten foam and cut it to pieces, so raised parts are built from satin columns
- Higher satin density so the thread fully covers the foam with no gaps along the sides
- Capped ends: every column end and sharp corner gets extra stitches that cut and seal the foam, so nothing peeks out
- Light underlay under the foam, mostly a centre run, so the column keeps its height instead of being pressed flat
- A machine stop before the puff layer, so the operator can place the foam after the flat elements are finished
- Flat elements sewn first, puff elements last, with the sequence planned so the foam is placed once, not several times
- Column widths kept in the puff range and anything too thin or too wide switched to flat stitching
- Centre-out sequencing on caps, the same way I build every cap digitizing file
Puff design rules: what works and what doesn't
Before I start, I check your artwork against these limits. If a part of the logo won't puff well, I'll tell you in the quote and suggest a flat or mixed version instead of sending a file that disappoints on the machine.
| Element | Works for puff? | What I do |
|---|---|---|
| Bold letters | Yes, best case | Satin columns roughly 3 to 12 mm wide puff cleanly. Block, varsity and heavy script fonts are ideal. |
| Small text | No | Lettering under about 0.25″ tall can't hold foam. Sewn flat beside the puff element. |
| Thin outlines | No | Columns under about 3 mm cut through the foam. Kept as flat satin or run stitches. |
| Large solid shapes | Rarely | Wide areas need fill stitches, which crush foam. Split into narrower columns or sewn flat. |
| Sharp corners | With care | Corners are capped and slightly rounded so the foam is sealed and the edge stays crisp. |
| Gradients, photos | No | Puff is one solid raised colour per element. Shading is redrawn as clean shapes. |
Where 3D puff works best
Most puff orders are cap fronts: structured six-panel caps, snapbacks and trucker caps, where a raised wordmark of about 2″ × 4″ fills the front panel. It also works well on the chest and back of sweatshirts, hoodies and varsity jackets (see jacket back digitizing), where heavier fabric supports the foam. Soft, stretchy or knitted fabrics such as beanies and thin tees are harder, because the fabric moves under the foam. For those I usually recommend flat embroidery or a smaller puff element, and I'll say so in the quote.
Production tips for your shop
A good file does most of the work, but a few habits at the machine make puff look its best. I add these notes to the colour sheet with every puff file:
- Match the foam to the thread colour, so any tiny gap at a column end disappears
- Use 3 mm foam for most caps and logos; thicker foam needs a file built for that height, so tell me if you use it
- Slow the machine down on the puff colour to keep the satin even over the foam
- Tear away the excess foam gently along the perforations, then use a heat gun on low to shrink any small fibres
- Run a test sew-out on the same cap or garment first; if anything looks off, send me a photo and I'll adjust the file for free
Common 3D puff problems and how the file fixes them
| Problem | Usual cause | Fix in the file |
|---|---|---|
| Foam showing | Open column ends, low density | Cap every end, raise satin density over the foam |
| Flat puff | Heavy underlay or fill stitches | Centre-run underlay only, satin columns instead of fills |
| Fuzzy edges | Stitch spacing too wide at the edges | Tighter edge penetration so the needle cuts the foam cleanly |
| Crooked on cap | Flat sequencing on a curved frame | Resequence centre-out and bottom-up for the cap frame |
| No stop for foam | Puff and flat parts mixed in one colour | Separate colour step with a stop before the puff layer |
Already have a puff file that sews like this? I can repair it or rebuild it. See file conversion and fixes. If you digitize your own files, the step-by-step guide on how to digitize 3D puff embroidery covers the foam stop, density, underlay and end caps in detail.
What to send for a 3D puff order
- Your logo: JPG, PNG, PDF, AI or even a photo
- The garment: structured cap, trucker, hoodie, jacket and so on
- Size in inches and placement
- Which parts you want raised, or "suggest for me"
- Foam thickness, if you use something other than 3 mm
- Your machine brand or file format
What you get
Your puff file in the format your machine reads, such as DST for Tajima and most multi-head machines or PES for Brother and Baby Lock (see the embroidery file formats guide), plus the editable EMB master file, a colour sheet that marks the foam stop, and a design preview with the stitch count. If you also need the same logo for polos or for a flat cap, ask for a flat version with the order. Small edits are free until it sews right.
3D puff digitizing price
Flat cap and left chest logos up to 4 inches start at $10. 3D puff takes extra planning (puff and flat layers, end caps and a foam stop), so every puff design gets an exact fixed price with your quote, usually within the hour, before any work starts. The digitizing cost guide explains how size and stitch count affect the price.
Frequently asked questions
What is 3D puff digitizing?
It is embroidery digitizing made specially for foam. The file uses dense satin columns, capped ends and a machine stop so the operator can place foam, and the stitches cut and seal the foam to leave raised, rounded lettering.
Can I use a normal embroidery file for 3D puff?
Usually not. A flat file has fill stitches, open column ends and lighter density, so foam shows through the sides and the letters flatten. The design needs to be redigitized for puff, with flat details kept separate.
How much does 3D puff digitizing cost?
Flat cap logos up to 4 inches start at $10. Puff designs take extra planning, so you get an exact fixed price with your quote before any work starts. Your machine format, the editable EMB and small edits are included.
How small can 3D puff lettering be?
As a rule, puff needs satin columns roughly 3 to 12 mm wide and letters about a quarter inch tall or more. Smaller text and thin outlines are sewn flat next to the puff parts.
What foam thickness is the file made for?
Files are built for standard 3 mm embroidery foam unless you tell me otherwise. Thicker foam needs more density and stronger end caps, so mention it when you order.
Which file format do you deliver for 3D puff?
Any format your machine reads, most often DST for commercial multi-head and cap machines and PES for Brother and Baby Lock, plus the editable EMB file and a colour sheet that shows where the machine stops for foam.
Related services and guides
Send your artwork. Get a quote within the hour.
Fill in the form for a free quote, or order through Fiverr or Upwork, where your payment is protected until you're happy with the files.